Start selling on Eden
Set up your store, pick what to sell, get paid through Stripe, and run it all from Your store.
In the workspace you want to sell from, click the Store icon at the top of the sidebar. Claim a handle, then click New product on the Products tab. Building products starts on the $5 Discover plan. Publishing needs Starter, Pro, or Max on the store's workspace.
Set up your store
- 01
Claim your handle
In Your store, go to Storefront and click Claim handle. It becomes your store address.
- 02
Connect Stripe
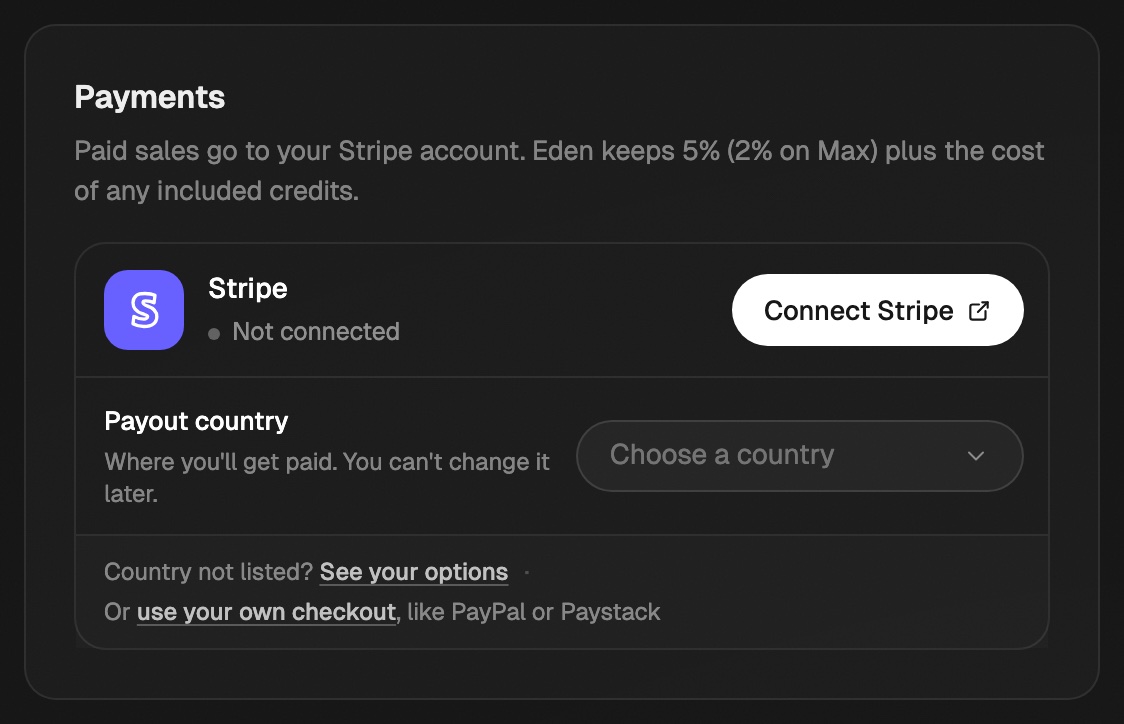
On the Payments row, pick the country you'll be paid in, then click Connect Stripe. You only need this for paid products. If Stripe has to check your details first, the row says In review. There's nothing else to click. We email you when you can take payments, usually within a day.
Pick your payout country first. Stripe won't let you change it later. - 03
Add a support email
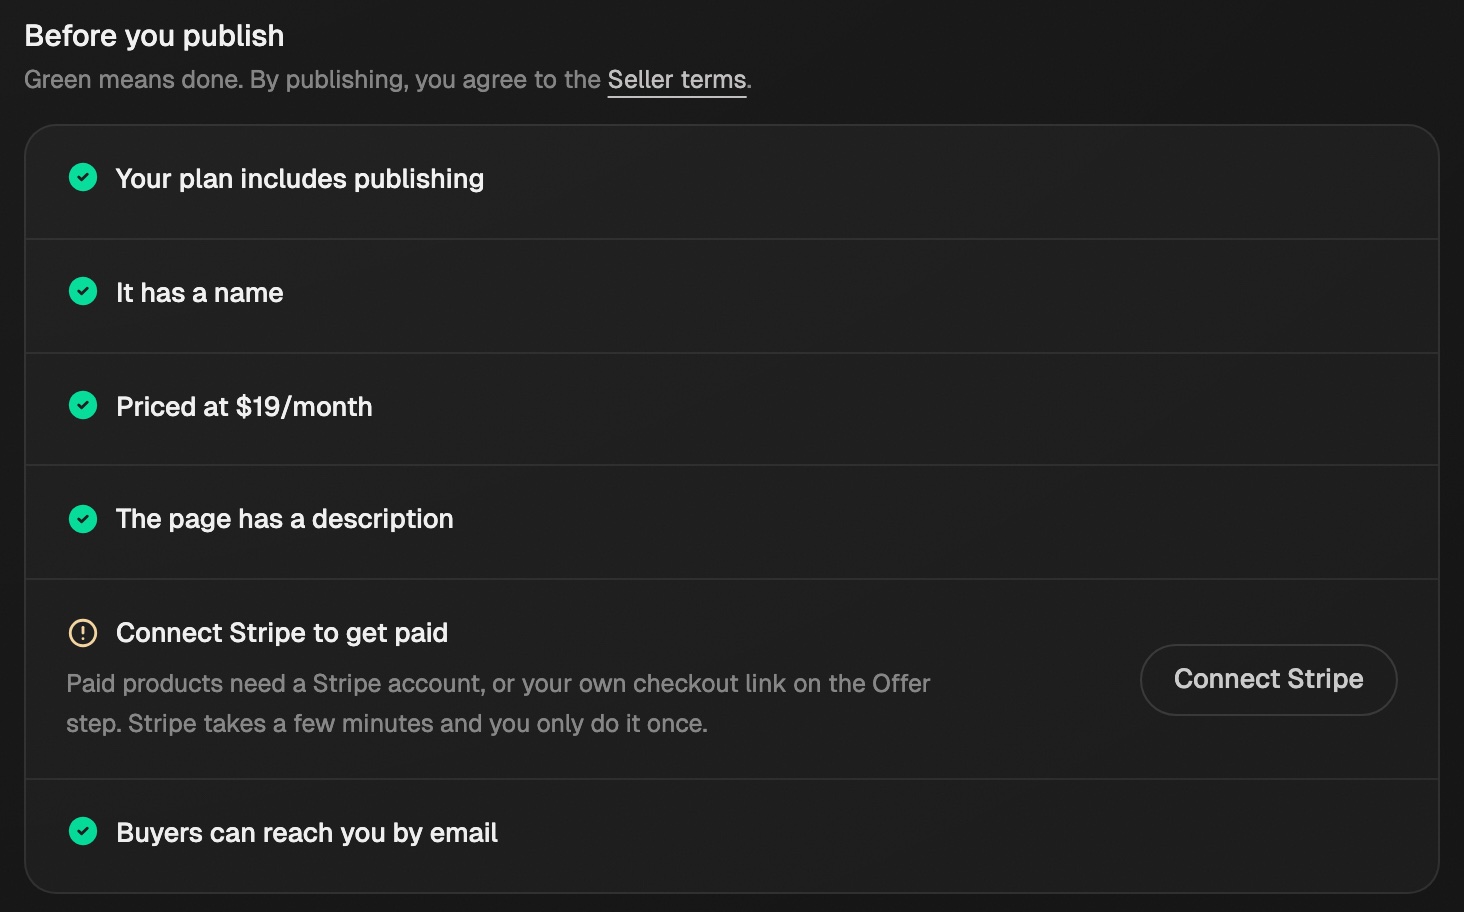
Add a Support email on Storefront, under Emails. Every product needs it before it can go live.
- 04
Make a product
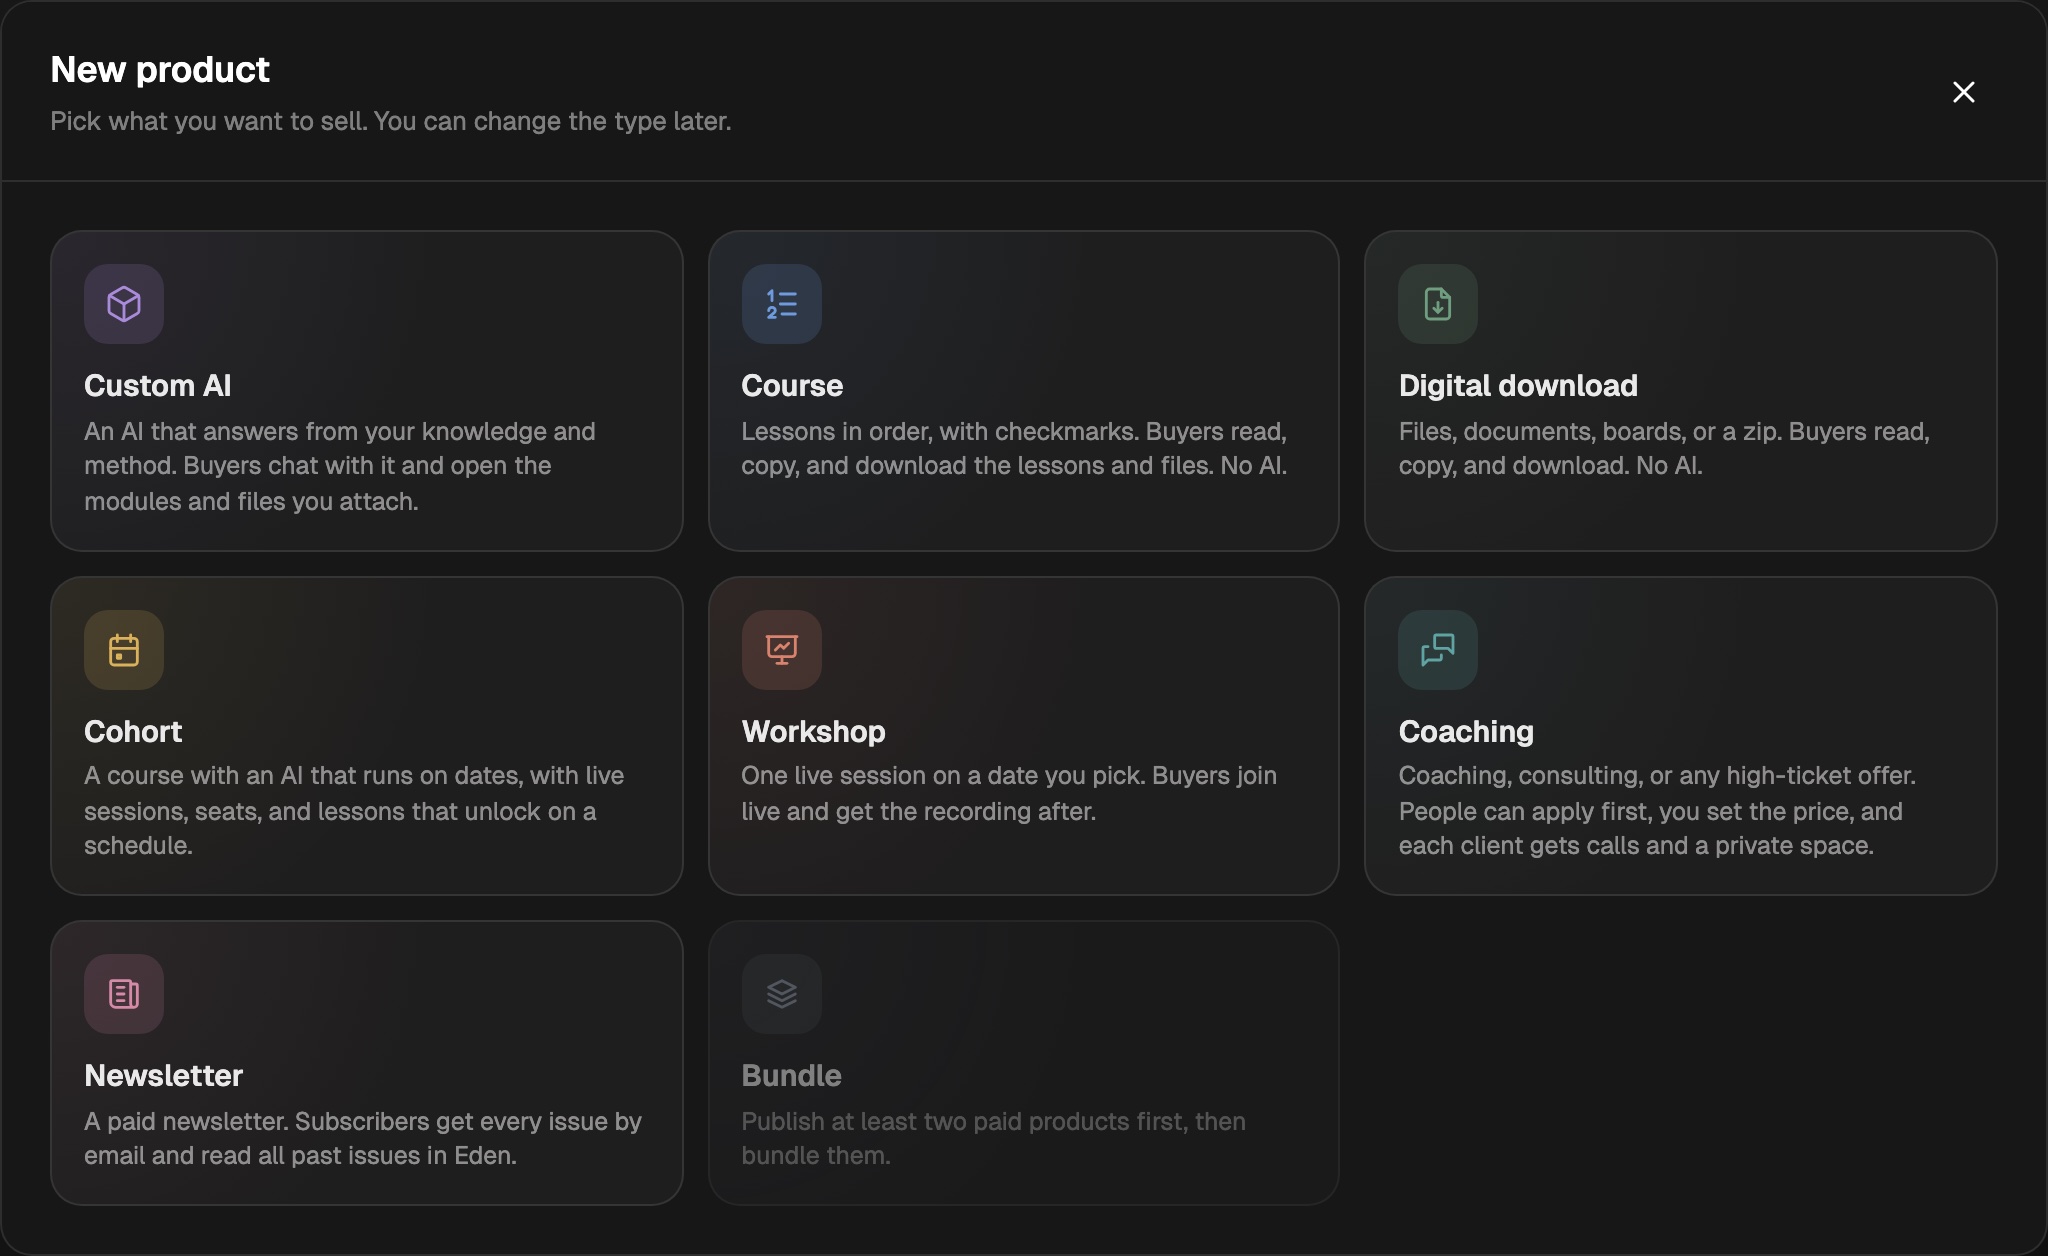
On Products, click New product and pick a kind. The editor walks you through each step.
- 05
Publish
On the Publish step, turn every item on the checklist green, then click Publish.
Pick what to sell
| Kind | What buyers get | Guide |
|---|---|---|
| Custom AI | An AI that answers from your knowledge, plus modules and files | This page |
| Course | Lessons in order with checkmarks, with or without an AI | Sell a course |
| Digital download | Files, documents, boards, or a zip. No AI. | Sell a digital download |
| Cohort | A course on set dates, with seats and live sessions | Run a cohort |
| Workshop | One live session on a date you pick, with the recording after | Run a cohort |
| Coaching | Calls with you, a private space, and an AI. People can apply first. | Sell coaching |
| Newsletter | Issues by email, plus every past issue to read in Eden | Sell a paid newsletter |
| Ask me | Answers to their questions from you, by text, voice note, or video | Sell paid questions |
| Bundle | Several of your products at one price. Needs two live paid products. | Sell a bundle |
Any product can also bill monthly or yearly. See Sell a membership.
Already built a Custom AI? It shows under Custom AIs you can sell on Products. Click Create product next to it.
What Eden charges
| Sale | Eden's cut | Other fees |
|---|---|---|
| Paid, through Eden checkout | 5% of each sale | Stripe's processing fee, from your share |
| Membership renewal | 5% of each payment | Stripe's processing fee |
| Your own checkout link | Nothing | Your checkout's own fees |
| Free product | Nothing | None |
| Included AI credits | $0.04 per credit, off the sale | Taken before Eden's cut |
Eden's cut is 5% on Starter and Pro, and 2% on Max and Agency. Marketplace sales are 10%.
- Paid products cost at least $1.
- Money goes straight to your Stripe account. Payouts, balances, and disputes live in Stripe.
- Stripe locks your country to the account. Picked the wrong one? Use Start over on the Payments row before you sign Stripe's terms.
- Country not listed? See Sell from a country that isn't listed.
- Prefer PayPal, Gumroad, or another checkout? See Use your own checkout.
Set the offer
The Offer step holds the name, tagline, and price.
- Was price shows a higher price crossed out. Buyers still pay the real price.
- Price says, on a free product, picks what shows where the price goes: Free, My words (like "Pay after your call", up to 40 characters), or Nothing. It shows on the buy box, the page's closing line, and your store cards.
- Offer discount codes lets you add codes with a percent or dollar amount off.
- Include AI credits adds 100, 250, 500, or 1,000 credits per purchase (per month on a membership). Each costs you $0.04 out of the sale. On a free product they come from your Credits for customers balance. Needs an AI chat.
- How buyers pay switches between One-time and Membership.
- More from you picks which of your other products buyers see. See Show your other products to buyers.
To add more to the sale, see Add an order bump and Offer an upsell after checkout.
Build a Custom AI product
A Custom AI product has five steps: Offer, Knowledge, Configure, Page, and Publish.
- Knowledge: answer What are you selling? (An AI tool, An AI with a library, or A course taught by AI). Then add modules (lessons) and resources (files, boards, links).
- Configure: edit the AI's Instructions and up to four Conversation starters. Write with AI drafts both for you.
- Page: write the sales page beside a live preview. Headline and Subheadline are the big words at the top. Page sections turns parts like Reviews and Refund policy on or off. Write the page for me drafts the copy.
- Publish: the checklist and your share links.
Edit in chat, at the top of the editor, opens a chat that edits the product for you. It never publishes unless you ask.
Preview as buyer, also at the top of the editor, opens the product the way a buyer gets it after paying. It's in each product's ⋮ menu under Products too. Nothing is created and nothing counts as a sale.
Buyers get Eden's 50 free AI credits. Their chats start on Fast, which costs 1 credit a message.
Publish and share
- Publish sits in the bar at the bottom of every step. It reads Publish update once the product is live.
- Under Share it, copy the Product page link, or Direct checkout to open just the buy box from your own site.
- To change the end of your product's link, click Edit next to Product page, type the new ending, and click Save link. Old links still work and send people to the new one.
- Not live yet? Share preview, at the top of the editor, makes a link anyone can open. See Share a preview of your product.
- Every product you publish is added to your creator page.
- Updating a product with buyers asks what changed. Click Publish and email to send each buyer your note, or Publish quietly to skip it.
Modules are frozen when you publish. Edit them, then publish an update to send the new version.
Run your store
| Tab | What it's for |
|---|---|
| Home | Sales, earnings, buyers, and a setup checklist |
| Storefront | Your page, handle, Stripe, and support email |
| Products | Every product, with views, conversion, and active buyers |
| Audience | Customers (buyers and refunds), email Subscribers, and Clients |
| Inbox | Approve reviews and testimonials, answer buyer questions |
| Integrations | Email list, ad tracking, webhooks, and your own checkout |
| Refer & earn | Your referral earnings |
Email holds Broadcasts, Newsletter, Sequences, and the rest of your emails. Forms & quizzes, Auto-DM, Affiliates, and Links sit under Marketing.
- Send buyers to your email list: Connect your email list.
- Bring buyers from somewhere else: Import and export customers.
- Let a teammate help: Give a teammate store access.
Sort your products into categories
On Products, click + Category at the end of the pills under the search bar, then type a name, like "Free guides" or "Courses". A product's ⋮ menu can make one too: Move to category → New category.
- To file a product, open its ⋮ menu, pick Move to category, then a category.
- Click a category's name to fold it. Each one shows how many products it holds.
- A category's ⋮ menu can Rename, Move up, Move down, or Delete category. Deleting one moves its products to No category.
- Click a category's pill to show only that category. All shows everything again.
- Products show as tiles with their cover picture. The grid and list buttons beside the search switch to a slim list and back.
Only you and your teammates see these. Buyers never do. To group your public page, use a Category block on your creator page.
Approve reviews
Buyers can leave one to five stars and a short review. Eden asks them for you. New and edited reviews wait in Inbox → Testimonials → Pending until you approve them.
- Pick reviews, then click Approve selected, or hide them.
- Request reviews emails eligible buyers or gives you a link to share.
- The Reviews switch on the Page step hides the rating and reviews from the page.
- To collect testimonials from anyone, see Collect testimonials.
Sell from chat or your AI app
The Product Builder is a free Eden AI that helps you shape an idea into a product and saves it as a draft.
You can also run your store from Claude or ChatGPT through the Eden MCP. Ask "how are my sales this week" or "sell my Newsletter Coach for $29." Saving never publishes. You confirm that yourself. Name the workspace to work on that workspace's store; otherwise it uses your main store.
Publishing means you agree to the seller terms.
Your creator page
The one link for your bio. Show your products and links on a page you control from your store.
Use your own checkout
Sell a product through PayPal, Gumroad, Paystack, or another checkout you already use, and give buyers access on Eden automatically.
Build an AI product from what you know
Use The Product Builder to turn your experience into a course, a product AI, and a sales page you can sell in your store.
Run a separate store in each workspace
Every workspace can have its own store, with its own link, Stripe payouts, products, and customers.
Get answers from the team and other creators.
Ask in the Eden help channel, see how others use the app, and come to the live workshops. Free with any Eden account.
Join the Eden CommunityEmail us. A real person reads every message.
Tell us what you tried and where you got stuck. We answer within one business day.
[email protected]